
|
Idaho Amateur Radio Emergency Service |

|
|||||||||||||
|
|||||||||||||||
|
|
Idaho Amateur Radio Emergency Service |
|
|||||||||||||
|
|||||||||||||||
Garmin Basecamp is a free application that allows you to display a map on your Macintosh or Windows PC computer. Basecamp supports the following features, which may be useful to the amateur radio operator who is performing an ARES role:
Display topographical maps (free topographical maps are available).
Manage and display waypoint data, including data from .gpx files. A .gpx file can be encoded with the following:
Waypoints
Tracks
Routes
A repeater directory, including frequency and CTCSS data (encoded as waypoints).
Incident Command and staffed locations (encoded as waypoints).
Station locations of Idaho ARES members (encoded as waypoints).
Display, with limitations, .kml data files, exported from Google Earth, including satellite imagery.
Import waypoints and tracks from compatible Garmin GPS receivers.
Export waypoints, routes and tracks to compatible Garmin GPS receivers.
The following URLs will allow you to download the Garmin Basecamp application and topographical map data.
Click here to download a free copy of Garmin Basecamp.
Click here to download a free topographical map of Idaho that can be imported into Garmin Basecamp.
To following steps illustrate how to setup the Garmin Basecamp application to use decimal degrees as the default coordinate system:
On Windows Select the Options... menu item that is found under the Edit menu. If not already selected, select the Measurement icon in the left hand column. Then, set the Grid pop-up menu to Lat/Lon hddd.ddddd°.

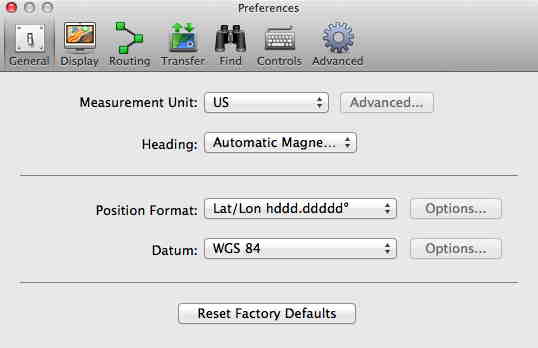
On Mac OS X Select the Preferences... menu item that is found under the Basecamp menu. If not already selected, select the General icon in the toolbar at the top of the window. The, set the Position Format pop-up menu to Lat/Lon hddd.ddddd°.
To following steps illustrate how to between coordinate systems. The conversion result is always expressed in the format that Basecamp is set to use as a default format (as in the steps in the section preceding this section). VCSAR members should be using decimal degrees as the native format.
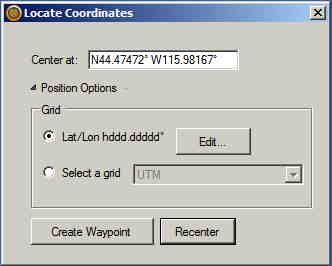
On Windows Select the Locate Coordinates... menu item that is found under the Find menu. This will display a Locate Coordinates window with a disclosure triangle that is labled Position Options. Click on this disclosure triangle to expand the window view to include the Position Options.
To convert from degrees-minutes-seconds format (i.e. hdd°mm'ss.s") to the default format, enter the coordinates in degrees-minutes-seconds.

Once the coordinate data has been entered, click on the Recenter button. The conversion will be performed in place, with the conversion result now shown in the text entry field. Do not hit the enter key after entring the coordinate data.
To convert from decimal-minutes format (i.e. hdd°mm.mmmmm') to the default format, enter the coordinates in decimal-minutes.
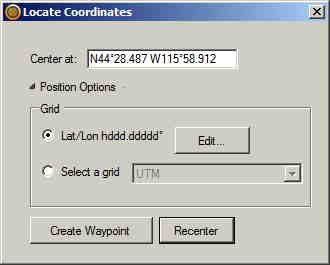
Once the coordinate data has been entered, click on the Recenter button. The conversion will be performed in place, with the conversion result now shown in the text entry field. Do not hit the enter key after entring the coordinate data.

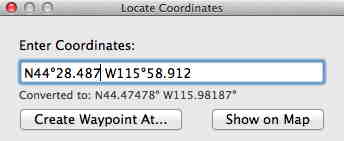
On Mac OS X Select the Find menu item that is found under the Find menu. This will display a small window with a text entry box.
To convert from degrees-minutes-seconds format (i.e. hdd°mm'ss.s") to the default format, enter the coordinates in degrees-minutes-seconds and read the converted result immediatelly below the text field. Do not hit the enter key after entring the coordinate data.
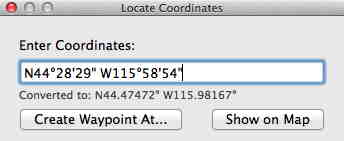
To convert from decimal-minutes format (i.e. hdd°mm.mmmmm') to the default format, enter the coordinates in decimal-minutes and read the converted result immediatelly below the text field. Do not hit the enter key after entring the coordinate data.
To following steps illustrate how to create a waypoint in the Garmin Basecamp application:
After launcing the Garmin Basecamp application, You will see a set of creation tools within the toolbar at the top of the window (shown in red rectangle). If you move the cursor over the individual tool icons and pause, a tool tip will be displayed that indicates the function of each of the icons in the tool bar.
Before you create a waypoint, you will want to scroll and zoom to the area where you want to place the waypoint.
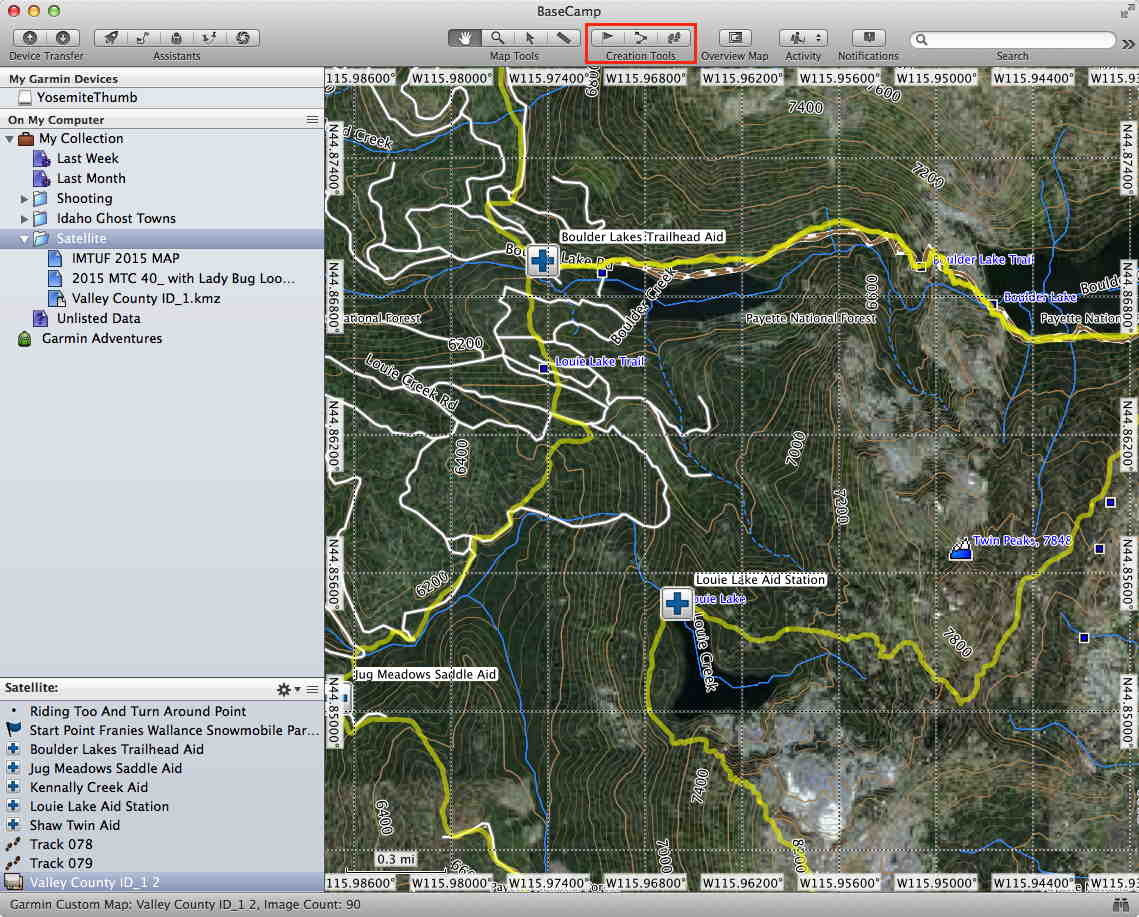
Click on the Flag icon  to create a waypoint.
Click on the map where you want to drop the waypoint flag. This will result in displaying a dialog box window where you can select which of your collections (listed along the left hand side of the window) that you want the new waypoint to reside in.
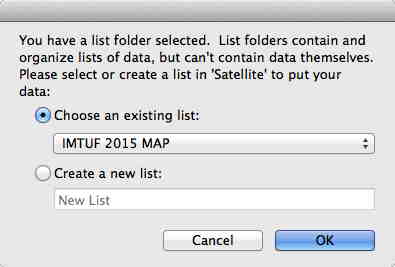
Use the pop-up menu to select the desired target collection and click on the OK button.
A window is displayed that shows changing attributes of the waypoint, including the name of the waypoint. If not already selected, click on the General tab to select the window to change the waypoint name.
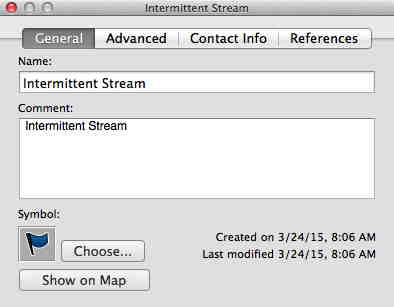
Enter the name of the waypoint in the Name field provided. You can also add information about the waypoint in the Comment field.
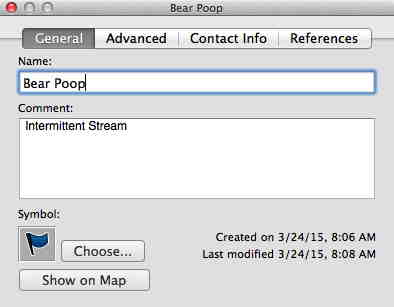
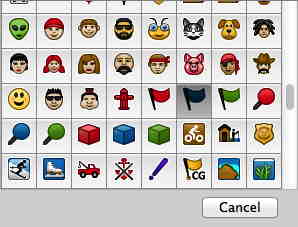
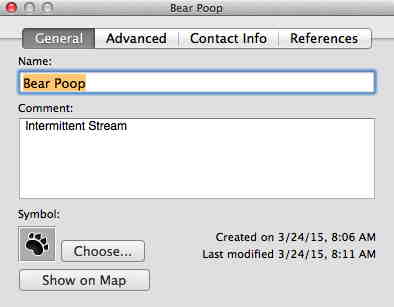
Click on the Choose button at the bottom left corner if you would like to change the waypoint symbol. This will display a list of symbols. Scroll to the symbol you wish to use and then click on that symbol to apply the icon to the waypoint.
Note that the new symbol appears at the bottom left hand corner of the waypoint information window.
To fine adjust the position of the waypoint, click on the Adavanced tab. You can then edit the latitude & longitude values in the Position field.

Close the dialog box window after editing of the waypoint attributes is completed. Click on the hand
icon  to enable scrolling on the map.
The new waypoint now appears on the map.
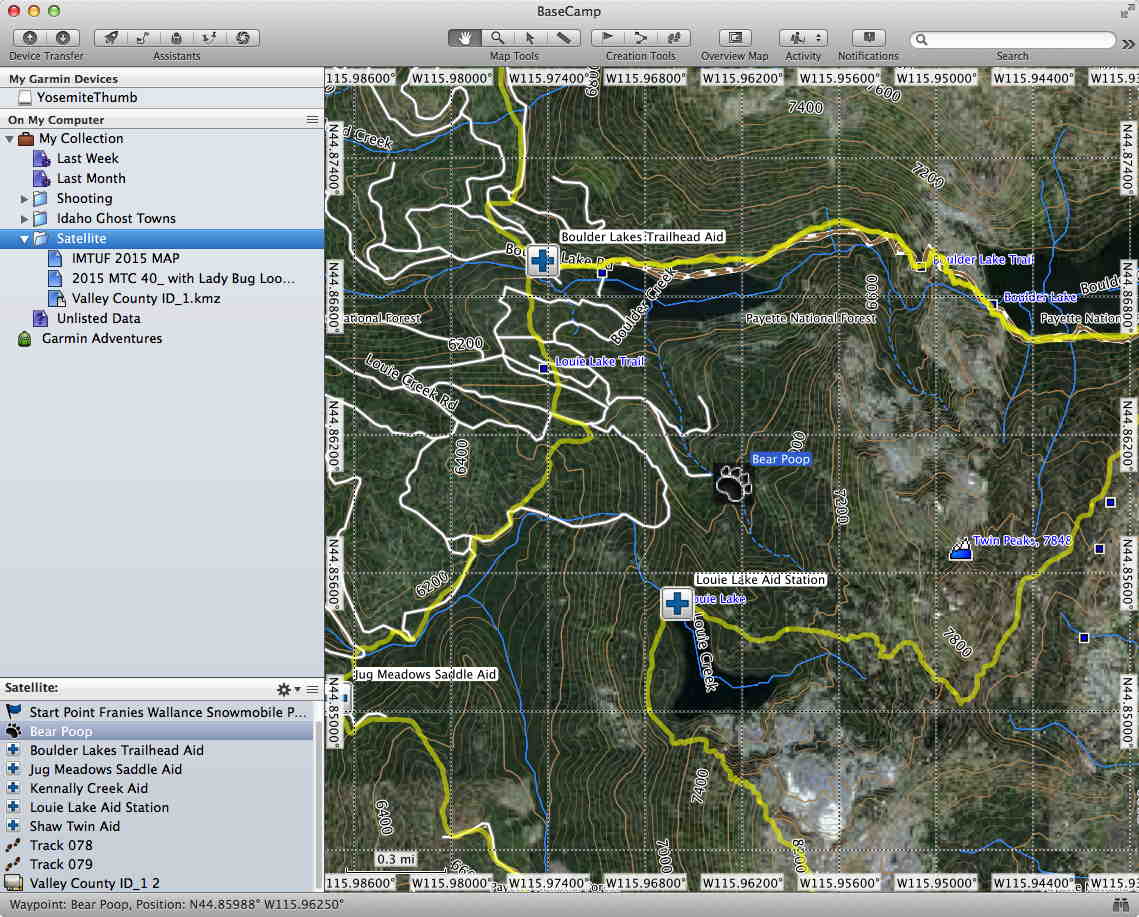
If you wish to edit the waypoint at a later time, the waypoint will be listed in the bottom section of the left hand column of the window when the collection that the waypoint resides in is selected. To edit the waypoint, right click on the waypoint in the collection list at the left hand column, and select Get Info from the pop-up menu. The same dialog window that was previously used dialog window that was described above. Use the same processes as above to edit the attributes of the waypoint.
